Many wireless networks, especially older ones, use WEP encryption to protect the network from intruders and strangers. Once you've set up a wireless connection in Windows Vista with a WEP key, you can automatically connect to that network without having to re-enter the key every time. But if the WEP key is ever changed (either by you or someone else) you'll need to update the WEP key on your computer so that you can reconnect to that network.
In the system tray in the lower right corner of the screen there should be an icon for your wireless network that looks like two computers, one in front of the other. Right click on this icon and select "Connect to a network." If you don't see that icon, you can get to the same place by clicking on the Vista orb and then in the Run bar typing "network." When the results appear, click on Network and Sharing Center, and then click "Connect to a network" in the upper left corner.
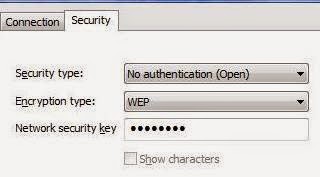
A list of available wireless networks will be shown. Find the network whose WEP key you want to update, and right click on it. When the context menu appears, select Properties. When the network properties window opens, click on the Security tab if it's not already the active tab. Next to "Encryption type" it should say WEP if this connection already uses a WEP key. If it says None, click on the down arrow and select WEP.
In the box next to "Network security key," type in the new WEP key. For each number or letter you type, a black dot will appear. If you want to see what you are typing, click the box next to "Show characters." Once you've entered the new WEP key, press OK to apply the change and close the window.
(Originally published on Helium.com, Sept 2011)
No comments:
Post a Comment