Showing posts with label print job. Show all posts

Tuesday, February 9, 2016

How to avoid the Load Extra Paper error on a Sharp MX series copier

If you're printing to a Sharp MX series copier and you're seeing the "Load Extra Paper" error (the exact wording varies on some models; it may say "Load A4 Paper") it's not because the copier is out of paper.  The document you are trying to print is either sized incorrectly, or its size does not match the size of any paper that's currently loaded in the copier.

To avoid this error, you can check document size before you print and make sure that you have the correct size paper loaded in the copier.  However, sometimes a document will be sized incorrectly, such as 8.5" x 11.35" instead of 8.5" x 11", so it won't match any standard paper sizes.  This often happens with documents emailed from other people or documents downloaded from the Internet.

In these cases, you can "force" the copier to print your document on paper that's a similar size by using the "Fit to Page" option.  The "Fit to Page" option tells the copier to scale the document down (or up) so that it fits onto a paper size that is currently in use by the copier, so the document can print out without generating an error message.

To enable "Fit to Page" on a Windows computer using the Sharp PCL6 print driver:

- When you choose the option to print your document, select Printer Properties (or Preferences on some computers) in the print dialog box
- Click on the Paper tab
- Select Fit to Page
- Select OK
- Select Print

Before enabling "Fit to Page" if you get the "Load Extra Paper" error, you can either manually choose a paper size to print on, or you can delete the current print job, enable "Fit to Page", and print the document again.  To cancel the current print job:

- Select Job Status
- Select the print job to cancel, if there are multiple jobs listed
- Select Stop/Delete
- Select Yes

Monday, January 4, 2016

How to print an envelope from Microsoft Word 2003

Microsoft Word 2003 can print other things besides just documents.  If you need to print an address or return address (or both) on an envelope, you can use Word to do it by following the steps below.

Word can only print envelopes to the default printer.  So the first thing you have to do is make sure that the printer you want to print envelopes from is set as your default printer.  Go to Printers and Faxes (in newer versions of Windows, go to Devices & Printers) and change your default printer if you need to.  Right click on the printer and select Set As Default Printer.

Next, open Word 2003, go to the Tools menu and hover over Letters and Mailings.  A submenu should appear showing several options.  Click on Envelopes and Labels.  In the dialogue box that appears, make sure you are in the Envelopes tab.

There are two text boxes, one labeled "Delivery address" and the other, smaller one labeled "Return address."  Fill in the address or addresses you want to be printed on the envelope.  (If you have a Microsoft address book set up, you can click on the book icon to insert an address from your contacts.)  You can adjust the font, text size, or text style by highlighting the text you want to change, right clicking on it, and selecting Font.  Then, once you've made the changes you want to make, click OK to go back to the Envelopes screen.

Once you have the address filled in, make sure your printer is turned on and ready.  Place the envelope you want to print to in the paper tray in the correct orientation.  The orientation may vary by printer model.  Usually you can find this information in the user guide, but if not, you can click the picture of the envelope shown in the box labeled "Feed" in the Envelopes screen, and Word will show you how it recommends you set the envelope.  The orientation Word suggests isn't always right, so it's a good idea to run a test print first, either on an envelope or a plain piece of paper.

If you are using a non-standard envelope size, or if you want to change the alignment, click the envelope in the box labeled "Preview" and adjust any of the necessary settings.  Then click OK to save them.

Now that the envelope is in the tray and the address information is filled in, all you have to do is click Print.  If you've entered a return address, Word will ask you if you want to save this address as the default return address.  If you choose Yes, every time you go to print an envelope, the return address field will already be filled in for you.

(Originally posted on Helium.com, May 2010)

Tuesday, December 29, 2015

How to print labels using Microsoft Word 2003

Many computer users need to print labels, both for home and business use.  If you have a printer that you can print to from your computer, you can use Microsoft Word 2003 to print labels.

Before printing, make sure the labels that you have are compatible with your printer; otherwise, the label might not be aligned correctly, or it might smear or jam.  Most labels specify on their packaging what types of printers they are designed for, and you may be able to find a list of what types of labels are not meant for certain printers on the manufacturer's website.  Running labels made for an inkjet printer through a laser printer, for example, can cause all sorts of problems to the printer.

To print a label in Word 2003, click on Letters and Mailings under the Tools menu, and in the submenu that appears, select Envelopes and Labels.  Click on the Labels tab, and in the empty text box type the information you want to appear on your label.  By highlighting the text, right-clicking on it, and choosing Font, you can adjust the text's font, size, and style.

In the lower right corner of the Envelopes and Labels window is a box marked Label, with a picture of a label.  Click on the picture to bring up the Label Options windows, where you can tell Word what kind of labels you have.  Select the type of label and the product number, and check the specifications to make sure you have the right one.

If you can't find your labels on the list, you can input the specifications for the labels manually by clicking on the New Label button.  Using the guide at the top of the screen, enter the label's dimensions and choose the page size.  Give the label a name and click OK to save it.  (You may want to print a test label first to make sure the dimensions are right.)

If you only want to print one label and not a full page of the same labels, click the button next to "Single label" below the text box.  As long as you are using a sheet with more than one label per page, you will be able to select which label you want to print, by choosing the row and/or column information.

Once you've got your label information entered and you're ready to print, put the sheet of labels in the printer, in the correct direction and orientation.  Some printers require paper to be fed face-up, while others need it to be face-down.  If you are not sure which way your printer prints, print a test page (using plain paper) to find out.

When the labels are in the paper tray and everything is set, the last thing to do is hit Print in the Envelopes and Labels window.  You won't be given the option to choose a printer, so make sure your default printer is the one you want to use.

If the label didn't print right, go back into the Envelopes and Labels window and make sure you had all of the information entered correctly.  If the labels jammed, they may not be compatible with your printer, and you may need to try a different kind of label.  For some printers, you will also need to make sure the printer is set for label paper in the tray that you are using; it may alter the print settings to optimize printing on labels.

(Originally published on Helium.com, May 2010)

Monday, October 12, 2015

How to cancel a print job to an HP LaserJet 9050 from the printer's web page

Occasionally print jobs get stuck or become corrupted, and you need to cancel them.  You can do this from the printer itself, by pressing the Stop button, but you can also do it remotely from your computer (as long as the printer is connected to the network).

On a Windows PC, you can often cancel a print job by going into the printer's queue, choosing the job and canceling it.  But sometimes this method won't work.  For example, if someone else sent the job, you may not be allowed to cancel it.  Or if you don't have rights to manage the printer, you may be prevented from canceling the job.  In either case, you can still cancel the print job through the printer's embedded web server (EWS).

To get to the EWS, you will need the printer's IP address and a web browser.  (If you don't know the printer's IP address, you can find it by printing out a configuration page -- instructions can be read here.)  Open the web browser, type in the printer's IP address and hit <ENTER>.

The printer's web page or web server should load, with the HP logo and information about the printer, including it's current status.  Once this page loads, look in the middle of the page.  If you see a red circle and the words "Cancel Current Job," click on the red circle and you will be able to stop the print job.

More than likely, you won't see that red circle.  It will need to be enabled.  Follow the steps below to enable the cancel print job option.

- Click Log In in the upper right corner of the page.  (If Log In is not there, skip this step and the next step.)

- Enter the administrator user name and password for the printer.

- Select the Settings tab.

- Select Security on the left side bar.

- Under Set Options, click the box next to Cancel Job.

- Scroll down to the bottom of the page and click Apply.

- Select the Information tab.

- Click on the red circle next to Cancel Current Job.

- Confirm your choice, if prompted.

Saturday, October 10, 2015

How to stop Microsoft Word from printing an extra page with your document

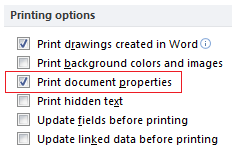
If an extra page prints out with your document when you print from Microsoft Word, the fix is very easy.  This page is called the document properties page, and it includes information such as the file name, any keywords, the total number of words, and much more.  It is a simple process to stop the document properties page from being printed.

To disable the document properties page in Word 2010:

- Open Word 2010
- Click on File in the upper left corner
- Select Options on the file menu
- Select Display in the left pane of the Word Options window
- Under the Printing options heading, click the box next to "Print document properties" to remove the check mark from it
- Click OK at the bottom of the window

These steps will also work for Word 2016.  For older versions of Word, you can see how to disable the document properties page in this Microsoft support article.

Tuesday, September 8, 2015

How to cancel a print job or copy job on a Sharp MX-M550N / MX-M620N / MX-M700N multifunction printer

Sometimes when you are copying or printing, you may need to cancel the current job, or a pending job.  For print jobs, you can often cancel them from your computer (depending on whether or not the job has already been sent to the printer) but for copy jobs you typically have to cancel them directly from the device itself.  Below are instructions for canceling a copy or print job from a Sharp MX-M550N, MX-M620N, or MX-M700N multifunction copier.

- Press the Job Status button
- Select the job you wish to cancel
- Select Stop/Delete on the touch screen
- Select Yes to confirm your choice

Saturday, August 29, 2015

How to cancel a print job on a Ricoh printer

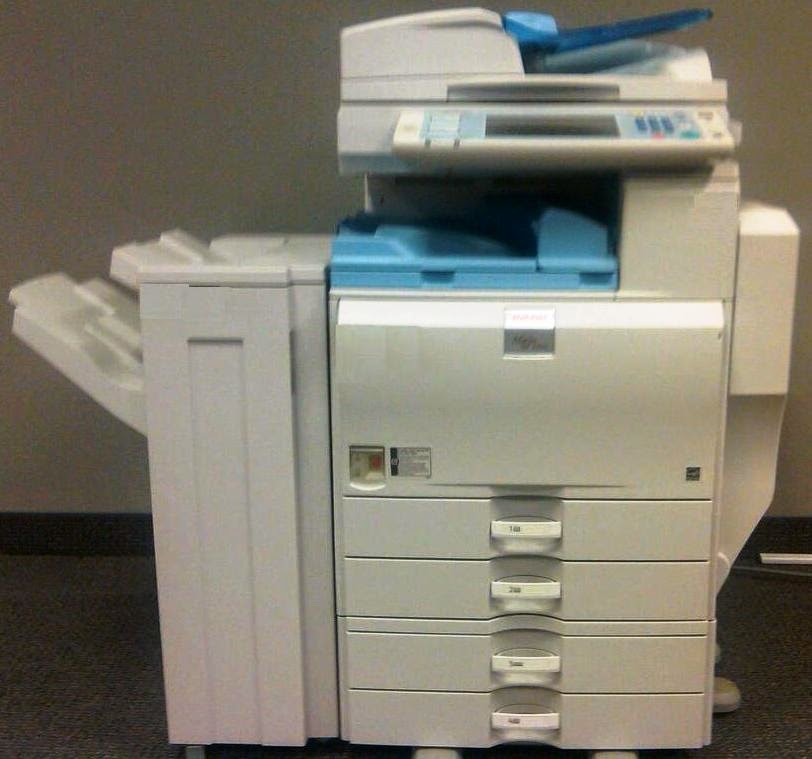
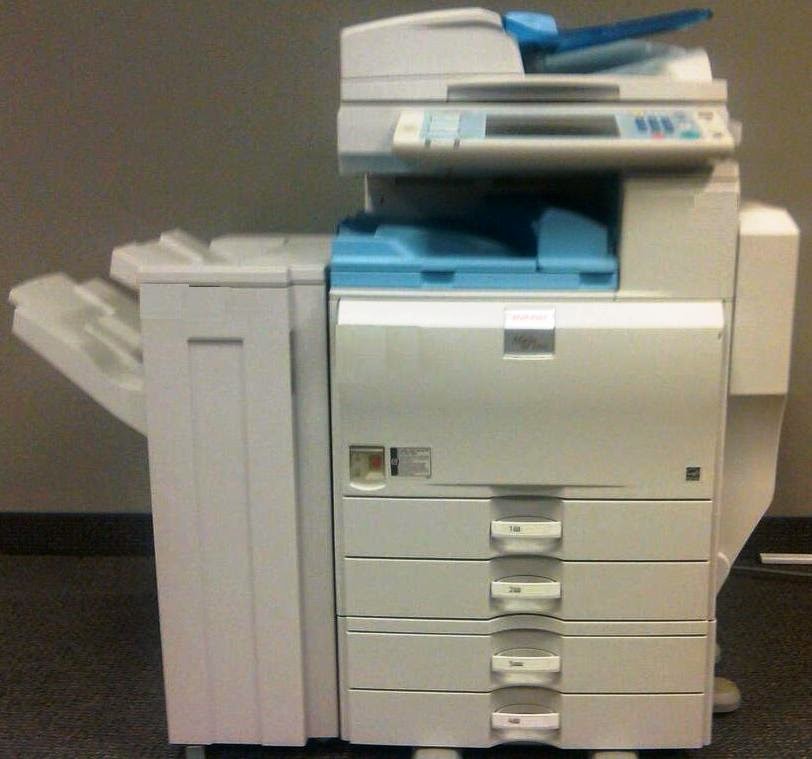
On most Ricoh printers, if you need to cancel a print job you can do it directly from the device.  On Ricoh multifunction printers with a touch screen, press the Printer button and then either select Job Reset on the screen or press the red Stop button.  You'll be asked to confirm your choice, and decide whether you want to cancel the current job or all pending jobs.

On Ricoh printers without a touch screen, you can probably cancel a print job by pressing the Job Reset or Cancel button.  If the printer has a display screen, you may be asked to confirm your choice.

For printers that are connected to a network, you can also cancel print jobs from your computer.  Open a web browser and navigate to the printer's IP address.  (If you don't know the printer's IP address, you can find it by printing out a configuration page.)  When the Ricoh web server page loads, click on the Login button in the upper right corner.  Enter the copier's user name and password, then click Login or press <ENTER>.

Hover over Device Management on the left side of the screen, then select Reset Printer Job.  Select either Reset Current Job or Reset All Jobs, then confirm your choice.

Tuesday, March 3, 2015

How to print to a Sharp MX series printer without using a print driver

On a Sharp MX series network printer, you have the ability to print without using a print driver.  Limited file types are supported (PDF, TXT, JPEG, TIFF, HTM) but it is a nice feature.  Printing without using the print driver is accomplished through the Sharp's web interface.  This method of printing can be a useful troubleshooting tool, but it is also nice for computers that don't support print drivers, such as Chromebooks.

To print to your Sharp MX series printer without using a print driver:

- Open up your web browser
- Navigate to the printer's IP address

(If you don't know the IP address of your printer, you can find it by printing out a configuration page.  Instructions for printing configuration pages from various Sharp models can be found here.)

- Click Document Operations on the sidebar on the left side of the screen
- Click Submit Print Job
- Under the "Print Settings" heading, set up any applicable job parameters (duplex, number of copies, stapling, etc.)
- Next to "Select File," click the Browse button
- Select the file you want to print
- Click the Print button at the bottom

Friday, January 30, 2015

How to restart the print spooler service in Windows XP

There are many different reasons why you may not be able to print from your computer. Sometimes, if everything else is fine and you can't figure out why you can't print, you may just need to restart your print spooler.

The print spooler is the program that takes your print job and sends it to the printer. If this program freezes or gets stuck on a certain job, you can restart it to get your computer printing again.  Here are instructions for how to restart the print spooler in Windows XP.

Press the Start button, and when the Start menu appears, click on Run. (If you don't see the Run option, skip to the next paragraph). In the Run box, type "services.msc". The Services window will open, showing all of the services that are currently installed on your computer. Some of these services are running and some have probably been stopped.

If you don't have the Run option on your Start menu, you can get to the Services window a couple of different ways. You can right click on My Computer from the Start menu (or from your desktop) and select Manage, then when the Computer Management window appears, click on Services and Applications in the left pane of the window and then in the right pane double click on Services. Another way to get to the Services window is to go through the Start menu; click on All Programs, then Accessories, then Command Prompt. When the Command Prompt window opens, type "services.msc" and then press <ENTER>.

Scroll down the list until you see "Print Spooler". Click on it to highlight it. A couple of options should appear in the middle of the window. One of these options is "Restart the service". (If you don't see the "Restart" option, then your print spooler is currently stopped for some reason. Click on the "Start" option to run the print spooler, then try to print.)  Click on Restart. A window with a status bar will appear, as Windows attempts to stop and then restart the print spooler. Once this action has been completed, the status bar window will disappear.

You can now close the Services window and try to print again. Hopefully your print job will print without incident now, but if you still have an issue with printing, you can rule out the print spooler as the cause of the problem.

(Originally published on Helium.com, January 2014)

Monday, August 18, 2014

How to Fix the SC899 Error on a Ricoh MP Series Copier

On older Ricoh copiers (as well as copiers and printers of other brands) if you had a corrupted print job that got stuck and held everything up, it would probably cause the device to lock up or freeze.  However, on newer models, a bad print job can cause an SC899 error code.  You can clear this error by turning the copier off and back on, but often it will come right back when the computer sending the print job tries to send it again.

There are many theories on what exactly causes the problem resulting in the SC899 error code.  In some cases it's caused by a TrueType font, while other times it may result from a very large print job.  Some people have reported the error only occurring when printing from a specific version of the Adobe Reader browser plug-in, or from specific versions of Internet Explorer.

Whatever the reason, you can fix the SC899 error code caused by a bad print job very easily, if you know what you're doing.  The first thing you'll have to do is find the computer that's trying to send the bad print job.  In a large office environment, this part may not be so easy.  One way to help track down the print job is to press the Printer button on the copier to bring up the printer screen.  The red box displaying the SC899 code will take up much of the screen, but above this box you can usually see the file name of the print job, or at least part of it.  That file name (or web address, for web pages being printed) can help you locate the user trying to print it.

Another way to locate the computer sending the stuck print job is to open up the print queue on anyone's computer.  In Windows, double click on the Ricoh printer in the Control Panel.  Next to one of the print jobs listed in the queue, you should see an error message.  That print job is the one causing the SC899 error, and the name of the computer where the job is being sent from will be listed on the same line as the file name.

Once you've found the computer that the print job is coming from, you'll need to cancel the print job.  How you'll do this depends on what type of operating system the computer is running.  In current versions of Windows, go to Devices & Printers from the Start menu (or Printers and Faxes in Windows XP) and double click on the Ricoh printer (or right click on it and select Open).  You should see a list of all files currently in the print queue.  Right click on the one that's causing the problems (it should be the top one, that says "Error" next to it) and select Cancel.

In rare cases, the print job won't cancel.  If that happens, you can either restart the print spooler (in Windows, you can find it in the Services window) or reboot the computer that was sending the print job.  If you don't have administrator rights on the computer, you probably won't be allowed to restart the print spooler, so your best option will be to reboot the computer.

As soon as the print job is canceled, go over to the copier and turn it off and back on.  When it comes back on and warms up, you should be able to print your other print jobs normally.

Ricoh has come out with several firmware updates attempting to fix the various reasons for the SC899 error, and they do tend to help.  The next time you talk to your Ricoh service technician, ask him to update your printer's firmware.  It's also a good idea to update the applications you use, especially if the SC899 error only happens when printing from specific programs.

(Originally published on Bubblews.com, February 2014)