Showing posts with label scanner. Show all posts

Tuesday, January 2, 2024

How to find the MAC address of a Ricoh Image Scanner IS200e

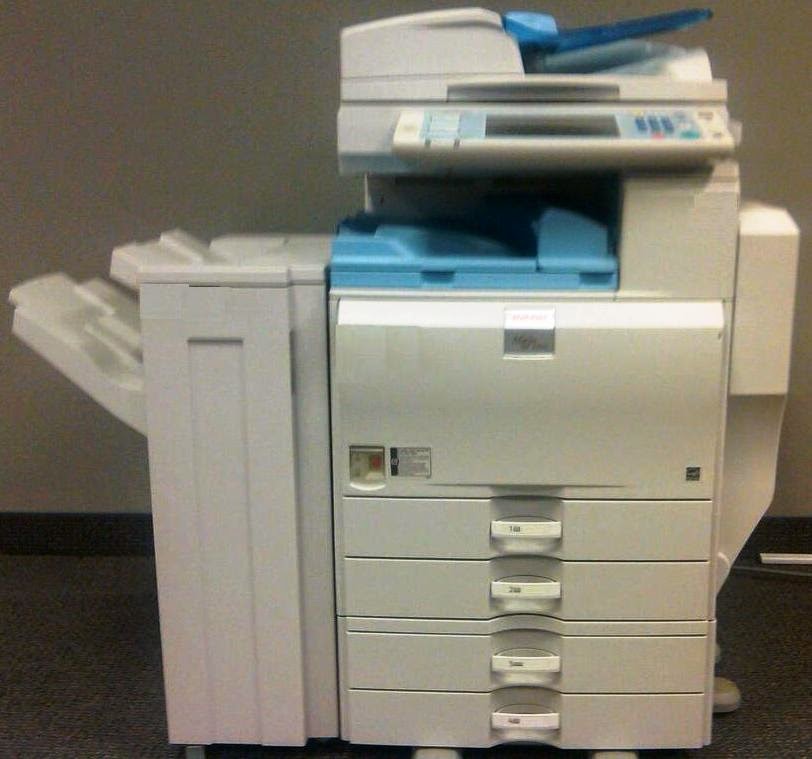
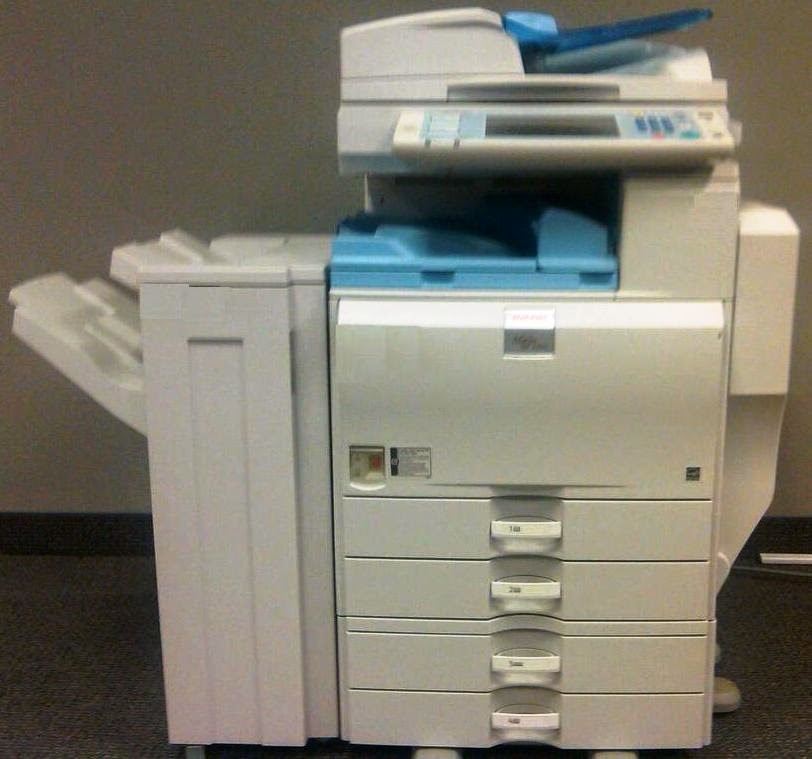
Ricoh Image Scanner IS200e

On network-connected printers and copiers, you can typically print out a configuration page which shows useful network information -- IP address, effective protocols, MAC address, etc.  But dedicated scanners don't have that option.

On a Ricoh IS200e scanner, you'll have to navigate the menus to view network information on-screen.  Follow the steps below to find the MAC address of an IS200e.

  • Press the User Tools button on the operation panel.
  • Press 1 to select "System Settings."
  • Scroll down through the menu using the button below the on-screen down arrow until you get to "9. MAC Address."
  • Press the button below the "Settings" option.
  • The MAC address will be displayed.
  • Press the User Tools button again to exit out of the menu.

🛈 The System Settings menu can also be used to display other network configuration settings, including the scanner's IP address.


(Originally published on Helium.com, 2012)

Sunday, January 27, 2019

How to scan a file to your computer


There are multiple ways to scan a document or image from a scanner to your computer. Which method works best for you depends on the scanner and what services you can access. Below are descriptions of three common methods -- scanning to a folder, scanning to an application, and scanning to email.

1. Scan to folder


If your printer allows you to scan to a folder, you can set up a shared folder on your computer and send files from the printer to that folder. The below article describes how to set up a shared folder on a Windows computer. (The steps will be similar for more recent versions of Windows.)

- How to create a shared folder in Windows XP

2. Scan to application


Some multifunction printers have software that will allow you to scan directly from the printer to your computer, either into a folder or into an application. One example of this is the Brother Control Center found on many Brother MFC printers. See your printer's manual for details on using this software.

3. Scan to email


While this method doesn't send the file directly to your computer, you can still access it from your computer and download or save it. Many printers will let you scan a file and send it as an email. In order to do this, you generally need to have an email server for the scanner to route the file through. If you don't have an email server or you're not sure how to set one up, see this article for instructions on using a Gmail account as a free email server for scanning:

- How to use Gmail as a free email service for your scanner

The article below includes common SMTP settings for web-based email providers that can be used for scanning to email:

- Common SMTP settings for scanning to email

If you run into problems setting up scan to email from your printer, see this article for troubleshooting help:

- How to troubleshoot scan to email problems from a scanner or multifunction printer

(published on HelpOwl, Jan 2019)

Saturday, February 17, 2018

Ricoh troubleshooting: How to fix a scan folder not found error

There are many possible reasons why you may not be able to scan to a folder from a Ricoh multifunction copier or scanner.  Here are some of the more common reasons, with suggested fixes:

- The folder that you are trying to scan to isn't shared.  Check the folder's share settings.

- The user account you are using to authenticate does not have rights to access that folder (possibly someone changed their password recently).  Update the password in the copier's address book (User Tools/Counter > System Settings > Administrator Tools > Address Book Management).

- There is a network connection problem somewhere between the copier and the computer.  Try to ping the copier from the computer and vice versa, then narrow down the problem by checking any intermediate devices (switches, hubs, routers, etc.).

- There is a hardware device or software program preventing the copier from reaching that folder (i.e. a firewall, anti-virus program, security suite, router, etc.).  Check any hardware/software security settings that may be preventing the connection.  You may have to set up an exception in your firewall.

- The copier and the computer are not in the same workgroup/domain.  Change the copier's workgroup or domain to match the computer you're trying to scan to.

- If you are using an IP address for the computer instead of a host name, the computer's IP address has changed.  Update the IP address, or change the destination path to use the computer's host name instead of IP address.

- If you are using the computer's host name in the scan folder path, the host name may have been changed, the DNS record might be corrupted, or the DNS server might be down.  Confirm that the host name is correct, and if it still won't connect, replace the host name with the computer's IP address in the scan folder path.

- The copier's SMB protocol has been disabled (User Tools/Counter > System Settings > Interface Settings > Effective Protocols).

If scanning to a folder was never fully configured, you can find instructions for doing so here:

Tuesday, November 28, 2017

How to reduce file size when scanning documents or images

scanner


When scanning a document, you can often get away with just placing the paper into the scanner and pressing Start.  However, if you scan a lot of documents, or if file size is an important factor, you'll probably want to check your settings to make sure you're not wasting disk space with bloated, unnecessarily large scan files.

Here are some things you can do to reduce the size of a document when scanning it into a computer or document storage system:

Scan in black and white

Unless you specifically need a color copy of the document, choose the option to scan in black and white.  Even if you are scanning a black and white document, make sure you check the color setting; a scanner set to scan in color may reproduce black on a page using multiple colors, which can make the file size significantly larger (often using 4 bits for every 1 that a black and white scan would use).

Some scanners will have an auto-select feature, which attempts to detect whether the document is black and white or color, and scan accordingly.  If you are scanning a stack of documents with only some in color, you may want to consider using this feature if it's available on your scanner.  It may be called Auto Color Select or something similar.

Reduce the resolution

Scanners typically measure resolution (the density of pixels) by dots per inch (DPI).  Lowering the DPI can drastically reduce the file size of a document.  For text-only documents, 200dpi is often sufficient.  For images or high-quality scans, you may want to use a higher number, like 400dpi.

Check your file type

The file type is a major determinant of how large a scanned file will be.  Unless you specifically need to use them, avoid scanning to TIFF or BMP files.  JPEG is a good format to use for images; it doesn't have all of the perks of a PNG file, but it does tend to compress the image to a smaller size.  PDF files are a mainstay of document scanning, and offer many useful features, but you can often get a smaller file by using an alternative format (such as DOCX).  Not all scanners will have the same range of file types to choose from.

Enable file compression

Most modern scanners have the ability to compress files so they take up less disk space.  Typically, this setting will be called File Compression, Scan Compression, Compression Ratio, or something similar.

Your scanner's user manual can tell you where to find the compression setting.  On a Ricoh MP series copier, for example, it would be in User Tools/Counter > Scanner Features > Send Settings.  Some scanners will allow you to tweak the amount of compression, while others will just have a basic on/off setting.  Compressing your file shouldn't change its appearance in any noticeable way.

Post-scanning adjustments

Once you've scanned your document or image to a file, there are still other things you can do to reduce the file size, depending on what type of file it is and which programs you are using.  Most image editors (including Microsoft Paint) will allow you to resize an image, and others (such as Microsoft Office Picture Manager) also offer the ability to further compress the file.  Adobe Acrobat includes a Reduce File Size feature that can shrink your PDFs.

Saturday, June 4, 2016

How to save an email address on a Sharp MX series copier

If you use your Sharp MX series copier for scanning to email, you may want to save email addresses to the copier's address book so you don't have to type them in every time you scan.  Saving email addresses to the address book is an easy task, and this guide will walk you through the process.  (For some older MX models, such as the MX-6210 or MX-M550, the steps may vary slightly.)

- Press the System Settings button.
- Select Address Control.
- Select Address Book.
- Select Add New (or Add).
- Address Type should be set as Email by default; if it's not, select Email.
- For Address Name, enter the name to associate with this email address.
- Scroll down to Email Address, and enter the destination email address.
- The other fields (ie. Initial) are optional and can be filled in or left blank.
- Select OK.
- On many models you'll see a message like "Registration is completed."  Select OK.

Some MX models have a pull-out keyboard which can make typing email addresses and long names easier.

If your copier has administrator mode locked down, you may be required to enter the administrator password in order to access the address book.

Wednesday, March 18, 2015

Common SMTP settings for scanning to email

When setting up scanning to email from a scanner or multifunction device, you'll need to know certain information about your email server.  Depending on the server and the device, the information you'll need will vary.  Below are the SMTP settings for some of the more commonly-used email servers.

Comcast:
SMTP server name:  smtp.comcast.net
Port number:  587 (if that doesn't work, use 465)
SSL required:  Yes
Authentication required:  Yes


Gmail:
SMTP server name:  smtp.gmail.com
Port number:  465 (if that doesn't work, use 587)
SSL required:  Yes
Authentication required:  Yes
Encryption:  Auto
If using POP before SMTP:
   POP server:  pop.gmail.com
   Port number:   995


Office 365 (now Microsoft 365):
SMTP server name:  smtp.office365.com
Port number:  587
SSL required:  No
TLS required:  Yes
Authentication required:  Yes


Verizon:
SMTP server name:  smtp.verizon.net
Port number:  465
SSL required:  Yes
Authentication required:  Yes


Yahoo!:
SMTP server name:  smtp.mail.yahoo.com
Port number:  465
SSL required:  Yes
Authentication required:  Yes

When using Yahoo! Mail to send scans, you will have a limit of 500 outbound emails per day.

Friday, February 6, 2015

How to troubleshoot scan to email problems from a scanner or multifunction printer

Many scanners and all-in-one printers (or multifunction printers) offer the ability to scan documents or images to an email address.  Depending on the device and your email server, this process can range from seamless to stressful.  If you're having problems setting up scanning to email, or if it worked before and it's not working now, here are some places to start the troubleshooting process:

- Check Your Settings

Sometimes settings can get entered incorrectly.  Other times, a power outage, power spike, or other event can cause the scanner to "lose" certain information, and you may need to enter it again.  Make sure the email server settings are entered correctly, including user name and password (if applicable), email server name, port number, and any protocols being used (SMTP, SSL, etc.)  If the password for that email account has recently been changed, it will need to be updated in the scanner's settings.  If your email server doesn't require a user name and password, make sure the authentication setting on your scanner is turned off.

If you're not sure what your email server settings are, this article lists the common settings for some popular email servers.

- DNS

If your scanner is connecting to your email server by its host name (such as smtp.gmail.com) rather than its IP address, you will need a valid DNS server in order to translate the name to an IP address.  Check to be sure your DNS server IP address is stored in your scanner, and also make sure that server is up and running.  If you don't have a DNS server, you can use Google's DNS server (8.8.8.8) or Comcast's DNS server (75.75.75.75).

- Gateway

In order to be able to communicate with devices outside your local network, the scanner will need to know your gateway IP address.  Typically, this will be the IP address of your router.  If you don't know your gateway address, this article can help you find it.

- Network Connection

Check the network connection from your scanner.  If the scanner is a multifunction device, you can check the connection by printing something to it.  Otherwise, you can try pinging it from a computer or other device on your network.  If the ping isn't successful, there may be a problem with the network cable, the scanner's network interface card (NIC), or an intermediary device on the network such as a hub or switch.

- Email Server

The problem may lie with your email server, rather than your scanner.  Try to send an email from your computer, using the same email account the scanner is set up to use.  If you don't have access to send emails from that account, ping the email server from your computer.

- Internet Access

Make sure you can get online from your local network.  If you can't, reboot your router or contact your Internet service provider.

- Gmail Authentication Issues

Gmail sometimes requires users to verify who they are when they log into their Gmail account.  It's a good security feature, but it can prevent automated devices (such as a scanner) from logging in.  Log into your Gmail account from a computer and see if you are required to verify your identity.  If so, you may need to turn the verification feature off in order to be able to send emails from your scanner.  Sometimes, if Gmail won't let you authenticate from the scanner, try logging into your Gmail account from a local computer and then log right back out, and that will correct the issue.

- Spam Folder

If your email provider doesn't recognize the "from" email address used by the scanner, it may send the scanned file to your spam or junk folder.  This is especially likely to happen if the message doesn't have a subject line, or if there's no email body, just the attached file.  Adding the scanner's email address to your contacts list can usually prevent this issue.

(Image courtesy of Pixabay)

Sunday, October 26, 2014

How to configure the default scan settings on a Ricoh MP series copier

On a Ricoh multifunction copier with scanning capability, the scanning options may be configured differently, depending on whether you got your copier directly from Ricoh, from an independent copier dealership, or if you purchased it used. However, you can easily configure the scan settings so that they are to your liking.

This article describes how to change the default scan settings for a Ricoh Aficio MP series copier. Just about any Ricoh Aficio MP copier with a color touch screen and the ability to scan can be configured using the procedure covered below, although for some models (including those with smaller touch screens) a few of the steps may be slightly different.

Press the Scanner button on the left side of the copier's operation panel (or select Scanner from the Home screen) to bring up the scanning screen. Then press the yellow Clear button to clear out any temporary settings that may have been set. The settings you see now (resolution, file type, etc.) are the default settings that the copier uses when you don't select anything different. You can change these settings to suite your needs.

The first step is to select whichever settings you want. If you want to change the default resolution to 300 dpi, go ahead and set that now. If you want to change the default file type to multi-page PDF, set that as well (under File Type). Select any settings that you want to change, but be sure not to change any settings that you want to remain the same.

Once you've selected all of the settings that you wish to change, press the Program button on the right side of the operation panel. Select Program as Default on the touch screen (it may be called something different, such as Program Current Settings as Default), then select Program.  When asked to confirm your choice, select Yes. The settings you've chosen will now be the default settings for scanning.

The default settings for the main scanning screen and the simplified display scanning screen are separate, so if you want to change the defaults for simplified display, you'll have to do that manually. Press the Scanner button, then the Simplified Display button to bring up the simplified display scanning screen. Now select the scan settings you want to save as the default settings. Press the Program button, and on the screen touch Program. You'll be asked to confirm your choice; select Yes.

(Originally published on Helium.com, January 2014)

Tuesday, August 19, 2014

How to print a scanner journal from a Ricoh Aficio MP series copier

The scanner journal on a Ricoh Aficio copier/scanner is a good reference for looking up past scan jobs and seeing which ones went through and which ones failed.  The journal doesn't show an image of the scan, just details about when it was sent, where it was sent to, and whether it succeeded in getting there.  This article will guide you through the steps necessary to print out a copy of the scan journal from a Ricoh Aficio MP series multifunction copier.  (Note that for some of the smaller MP series machines -- such as the MP 301, MP C305, MP 161, and a few others -- the exact steps will vary slightly because of the smaller screens on those machines, but in general the procedure will be the same.)

There are two way of printing the scan journal from most Aficio MP series copiers: printing from the Scanner screen, and printing from the User Tools menu.  Both ways result in the same journal being printed, but with one key difference.  If you print the scan journal from the User Tools menu, the scan journal entries will be deleted upon printing, whereas if you print the scan journal directly from the Scanner screen, the journal entries will remain in memory.  So the method you choose depends on whether you want to erase the scanner journal entries or keep them.

To print the scanner journal from the Scanner screen:

- Press the Scanner function key (or select Scanner from the Home screen)
- Select Scanned File Status at the top of the screen
- Select Print List (or Print, for older models)
- Press the Start button

To print the scanner journal from the User Tools menu:

- Press the User Tools/Counter button
- Select Scanner Features on the touch screen
- Select Print Scanner Journal, under the General tab
- Press the Start button

(Originally posted on Bubblews.com, February 2014)

How to set up email faxing from a Ricoh MP series copier

If your Ricoh MP series copier (MP 4001, MP C3503, MP 7502, etc.) has the capability to scan and fax, then you can use to it send faxes to an email address.  Setting up faxing to email is a fairly easy process, and if you have already set up scanning to email, then it should only take a minute or so.

These instructions are standard for almost all Ricoh multifunction copiers in the MP and Aficio MP series.  The only exceptions are a few of the smaller copiers (such as the MP C305 and MP 201) that either don't have touch screens or have smaller touch screens, and a few of the older copiers in the Aficio MP series, which might have the buttons on the screen arranged slightly differently.

The first step for setting up email faxing is to configure the SMTP settings for the copier so it is able to send emails.  If you've already done this, then you can skip this step.  Otherwise, step-by-step instructions for setting up scan to email can be found here:  How to set up scan to email from a Ricoh Aficio MP series copier.

Once you've set up email scanning, the only thing left to do to set up email faxing is to enable it.  Press the User Tools/Counter button (or the User Tools button on the high-volume copiers) and select Facsimile Features.  Select the Initial Settings tab, then select the Email Setting option.  Select On, the select OK to save the change.

You have now set up email faxing.  When you exit User Tools and go to the fax screen, you will see a tab on the screen labeled Email.  To send an email fax, select this tab and choose the email destination to fax to.  If everything is set up correctly, it should go right through.

(Originally published on Bubblews.com, March 2014)

How to specify a default sender on a Ricoh Aficio MP series copier

On a scanner or multifunction copier, when you use the scan to email function, the copier needs an email address to use as the "from" email address.  On a Ricoh MP series copier, you can select a sender to use each time you scan to email, or you can set the copier up to default to a specific email address, so you don't have to select it each time.

The steps below will walk you through specifying a default sender on a Ricoh Aficio MP series copier.  These steps work the same on most machines in the Aficio MP series, except for some of the smaller copiers that have a smaller touch screen or no touch screen at all.  For those copiers, the steps will be similar, but they may vary slightly.

- Press the User Tools/Counter button
- On the touch screen, select System Settings
- Select the File Transfer tab
- Select Administrator's Email Address
- Use the keyboard on the screen to enter the email address that you want to use as the default sending address
- Select OK
- Select the down arrow to scroll down to the next page
- Select Auto Specify Sender
- Select On
- Select OK
- Press the User Tools/Counter button to exit

(Originally posted on Bubblews.com, February 2014)

How to create a contact group on a Ricoh Aficio MP series copier

On any of the Ricoh Aficio MP series of multifunction copiers (MP 2852, MP C3300, MP 6002, etc.) you can store contacts for faxing or scanning in an address book.  There are a lot of ways you can organize these contacts, and one way is by putting them into groups.

The steps in this article will guide you through creating a new group in your address book, and also adding users into that group.  These steps are the same for all copiers in the Aficio MP series except for the ones without a touch screen or with a very small touch screen (such as the MP 171, MP 201, MP C305, and a few others).  For these copiers, the steps will be similar, but not identical.

At the copier's operation panel, press the User Tools/Counter button (or just the User Tools button, on some of the larger copiers).  From the User Tools menu, select System Settings.  Next, select the Administrator Tools tab, on the far right.  (On Ricoh copiers with a smaller screen, Administrator Tools will be a button on the screen, rather than a tab.)

From the list of available options, select the one labeled "Address Book: Program / Change / Delete Group."  Then select New Program.  Next to where "Group Name" is displayed, select Change.

Now you can type the name that you want to call the group.  You can use the soft keyboard on the screen, as well as the number pad, to enter the name.  When you are finished, select OK.  Then select OK again.

You have now created your new group.  To add a user to your group, select Exit and then choose the option for Address Book Management.  Here you'll see all the contacts in your address book; select the one you want to add to the new group.

When that contact's information appears, go to the Add to Group tab on the right side of the screen.  Select your new group from the list.  (Unless you've created other groups, it should be the only one there.)  Next, select OK, and this user will be added to the new group.  You can repeat this process to add other users to the group in the same way, and when you are finished, just exit out of User Tools and back to the main screen.

(Originally published on Bubblews.com, January 2014)

How to link to a network share folder from a Ricoh MP series copier

If your Ricoh MP series copier (MP C4000, MP C6003, MP 6002, etc.) is connected to your network, you probably have the ability to scan a document from the copier to a folder on your computer, or a folder on a server.  If the folder is already set up and shared, and you know its path, you can follow the steps below to link the copier to that folder, so that you can scan directly to that folder and not have to find it each time you want to scan.  (These steps will work for any Ricoh MP series copier with a touch screen, but they might vary slightly for copiers with the smaller touch screens, such as the MP 301 or MP C305.)

At the copier's operation panel, press the Scanner button, or select Scanner from the Home screen.  Select the Folder tab if it's not already the highlighted option.  Then, press the Prg Dest button on the screen.

You'll have two choices for linking to the network folder: you can browse to the folder, or you can type in the path manually.  To browse to the folder, select Browse Network and then navigate through the workgroups, devices, and folders until you find the folder that you want, then select OK.  (If this method doesn't work with your network, you may have to use the method below instead.)

To manually enter the network path, select Change and then use the soft keyboard on the screen to enter the path to your folder, using one of the two structures below:

\\computer's hostname\folder

or

\\computer's IP address\folder

Once you've typed in the path, select OK.  If you want, you can use the Connection Test option at the bottom of the screen to verify that the copier can connect to that folder.  While using either of these methods, you may be prompted to enter a valid username and password if your network requires authentication to access that computer and/or folder.

Select OK in the upper right corner, and you will be prompted to enter a display name for this folder.  This name is the description that will appear on the scanning screen for this folder.  You can use whatever name you want, but it should be descriptive enough so that you know which folder it is referring to.

After entering the name, select OK, then select OK again to finish the process.  That folder is now registered in the copier's address book, and you can scan to it simply by selecting it from the scanning screen and pressing the Start button.

(Originally published on Bubblews.com, November 2013)

How to set up scan to email on a Ricoh MP series copier

If your Ricoh MP series copier is connected to your network, you can set it up to be able to scan documents or images to email (assuming you have an active email server) with just a few steps.  All you'll need is some information about your email server -- server name, authentication credentials, SMTP port number, and any protocols that it requires (other than SMTP).

If you don't have an email server but you have a Gmail account, you can use Google's SMTP server for scanning to email through your Gmail account.  Instructions for doing so can be found here:  How to use Gmail as a free email server for your scanner.

Entering this information into the copier is not hard to do, and the steps below will show you exactly where to enter everything.  These steps are nearly identical for all Ricoh MP series copiers except for some of the smaller models -- such as the MP 2500, MP 2000, MP 171, MP 301, and a few others -- but for those models the steps will still be quite similar.

To begin programming your copier for scanning to email, press the User Tools/Counter button on the copier's operation panel.  Then on the touch screen, select System Settings and select the File Transfer tab.

Almost all of the email settings you will need are located on this page.  Select SMTP Server and input your email server's host name.  (If you don't have DNS configured, you will need to enter the SMTP server's IP address instead of its name.)  Underneath the name, select SSL if your server requires it (and if it appears as an option -- some of the older copiers will not have the SSL option).  If the port your server uses is different than the default port (25 if not using SSL, or 465 if SSL is enabled) enter the correct port number on this screen as well.  If there is a button labeled Connection Test, select this button to verify that the copier can connect to the SMTP server.  Then select OK in the upper right corner to save your information.

The next setting is SMTP Authentication.  If your email server does not require authentication, you can skip this step.  If the email server does require authentication, select this option and enter the user name and email address -- which may both be the same -- and the password.  (You'll be prompted to type the password twice, to confirm it.)  For most servers, you can leave the encryption setting to Auto, unless you know that your server requires you to change it.  Then select OK to save the information you entered.

Next, look for a setting labeled Administrator's Email Address and select it.  (If you don't see it, scroll down to the next page.)  Enter the email address that you want to appear as the "from" address when you send scans from the copier.  Unless your email server requires it, this does not have to be a "real" email address.  For example, you could use "scanner@company.com," or something similar.  Then, once you've entered and saved this email address, you'll be returned to the File Transfer menu.   Locate the setting labeled Auto Specify Sender, and set it to On, then select OK.

Now just exit out of User Tools and give the copier a minute to apply the new information, and your scan to email function should be all set up and ready to use.  You can either enter email addresses manually, or store them in the copier's address book.  The article linked to below will give you instructions for adding email addresses to the address book.

- How to save an email address on a Ricoh MP series copier

(Originally published on Bubblews.com, December 2013)

How to delete an email address from a Ricoh MP series copier or printer

On Ricoh copiers and printers that are connected to a network, you have the ability to set up an address book to store contacts so you can scan documents to them without having to type everything in each time -- you can just select the contact on the screen and press Start.  But as employees leave your company or email addresses change, you may wish to delete some old email addresses out of your Ricoh's address book.  Here's how to delete an email address from a Ricoh MP series copier or printer:

To delete an email address, you'll need to go into the address book.  You can do this by pressing the User Tools/Counter button on the operation panel (on some Ricoh printers, this button is just labeled User Tools) then select System Settings on the screen.  From the System Settings menu, select the Administrator Tools tab all the way on the right.  Then select the option for Address Book Management.  (Some of the newer Ricohs have the Address Book Management option available on the System Settings menu; if so, you can select it there instead.)

Now you're in the address book.  Select the Email tab to view all of the stored email addresses.  (To delete a different type of contact, select that type instead -- Fax, Folder, User Code, etc.)  Then select Delete, and choose the email address you wish to remove.  You'll be asked to confirm your choice, and once you do that the email address will be erased.

You can also use these instructions to remove fax numbers, scan folders, user codes, and other address book entries -- just select the type of contact you want to remove when you are in the address book, or scroll through the contacts available to find the one to delete.

(Originally posted on Bubblews.com, November 2013)

How to register an email address as a sender on a Ricoh Aficio MP series copier

When you scan a document or image from your Ricoh scanner to an email address, the scanner needs to have an email address that it can use as the sending, or "from," email address.  You can set up the copier to use a default administrator email address for every email that you send, or you can specify a sender each time you scan to email.

In order to do the second option, you need to have at least one email address set up in your address book as a sending email address.  By default when you add an email address to the address book, it's registered as a destination, but not necessarily as a sender.  However, this article will walk you through registering an email address as a sender on your Ricoh Aficio MP series copier/scanner.  (Some smaller MP series models will have slightly different instructions, including the MP 201, MP C305, and a few others, but in general the steps will be the same as those listed here.)

First, in order to register an email address as a sender, you must have it programmed into your copier's address book.  If you don't have the email address that you want to use as a sender programmed in yet, you can find the instructions for doing so here:  How to save an email address on a Ricoh Aficio MP series copier.

To register an email address as a sender:

- Press the User Tools/Counter button
- On the screen, select System Settings
- Select the Administrator Tools tab
- Select Address Book Management
- Select Email, so that only the email addresses are shown
- Select the email user that you want to register as a sender
- Select the Protection tab
- Select Sender, so that it becomes highlighted
- Select OK to save the change

You can register all of your email addresses as senders, if you want.  Just select each one from the address book screen and follow the steps above.  When you are finished, press the User Tools/Counter button to exit back to the main screen.

(Originally published on Bubblews.com, February 2014)

How to save an email address on a Ricoh MP series copier

Any Ricoh MP series copier (such as the MP 4000, MP C2051, MP C6501, etc.) with scanning capability lets you store an address book inside the machine, so that when you want to scan a document to an email address, you don't have to type the address in every time.  This address book is customizable, and you can add email addresses to it very easily.  To add an email address to any MP series model that has a touch screen, simply follow the steps below.  (For the MP 301 and MP C305, with the smaller touch screens, the steps might vary slightly.)

Press the Scanner button to bring up the scanning screen, or select Scanner from the Home screen.  If the Email tab is not the active tab, select it now.  Then tap the Prg Dest (short for "Program Destination") button on the touch screen.  (For models with the monochrome touch screen, you'll have to select Manual Entry, input the email address, and then select Prg Dest.)  Next, select the Change button to the right of where "Email Address" is displayed.  A soft keyboard will be displayed, which you can use to type in the email address you want to enter.  (Numbers can be typed by using the number pad.)

Once you have finished typing the email address, select OK in the upper right corner, then select OK in the upper right corner again.  Now you'll be prompted to enter a name to be associated with this email address.  This name is the name that will be displayed on the screen for this address.  Enter the name, again using the soft keyboard, and select OK in the upper right corner.  Select OK one more time, and you're all done.  That email address is now saved in the system's address book, and it will be displayed on the scanning screen along with any other saved email addresses.

(Originally published on Bubblews.com, November 2013)

Tuesday, August 12, 2014

How to adjust the volume on a Brother MFC-8710DW multifunction device

The sound levels on your Brother MFC-8710DW are adjustable -- and you don't even have to get up from your computer to adjust them.  You can adjust the volume right from your computer or other mobile device connected to the network.

To adjust the sound for the MFC-8710DW, open a web browser and go to the Brother's IP address.  If you don't know the IP address, you can print out a network configuration page, which will have the IP address listed on it.  (Instructions for printing the network config page can be found here: How to print a configuration page from a Brother MFC-8710DW.)

When the Brother web page loads, click on Sound Volume on the left sidebar.  You'll see options for the different sound types: Speaker, Ring, and Beeper.  Select the sound that you want to change and then choose one of the available levels -- High, Medium, Low, or Off.  Once you've made all the changes you want to make, click on the Submit button to save the changes.  If you're not sure what sound level you want, you can always test it and change it if it's too loud or too quiet.

Monday, August 4, 2014

How to scan to a USB drive from a Ricoh Aficio MP 301 copier

The newer Ricoh MP series multifunction copiers have built-in USB and SD slots right in the operation panel.  You can scan to drives or cards inserted in these slots, or print from them.  This guide will walk you through how to scan to a USB drive from your Ricoh Aficio MP 301 copier.  The steps for scanning to a USB drive from other Ricoh MP series copiers are very similar, but most other MP series copiers have larger screens, so there might be some variation in what each of the buttons are labeled.

To scan to a USB drive from a Ricoh MP 301:

1. Insert your USB drive into the USB slot on the right side of the operation panel.  (You should see the blue light next to the USB slot come on; if it doesn't, try reinserting your drive.)

2. Select Scanner from the Home screen, or press the Scanner hard key.

3. Select Send Settings, in the lower right corner of the screen.

4. Scroll down until you get to page 4 out of 5, then select Store File.

5. Select Store to Memory Device.

6. Select OK.

7. Scroll back up to page 1 out of 5 and choose any other options that you want to change (resolution, file type, color, etc.) then select OK.

8. Press the Start button.

You will see a message pop up informing you that the document or image is being scanned.  Don't remove your USB drive until you see the message saying "Writing Complete," otherwise you could damage the data on the drive.

Wednesday, July 23, 2014

How to edit an email address on a Ricoh MP series copier

If you have an email address stored on your Ricoh MP series copier/scanner and you need to change it, you can do so easily by following the steps below.  (Note that for Ricoh MP series copiers with reduced-size touch screens like the MP 301, or without a touch screen like the MP 2500, the steps will vary slightly.)

- Press the User Tools/Counter button (the User Tools button on larger models)
- Select System Settings
- Select the Administrator Tools tab (the Administrator Tools box on smaller models)
- Select Address Book Management
- Select the user whose email address needs to be changed
- Select the Email tab
- Make the necessary changes to the email address and select OK
- Select OK again to save the changes